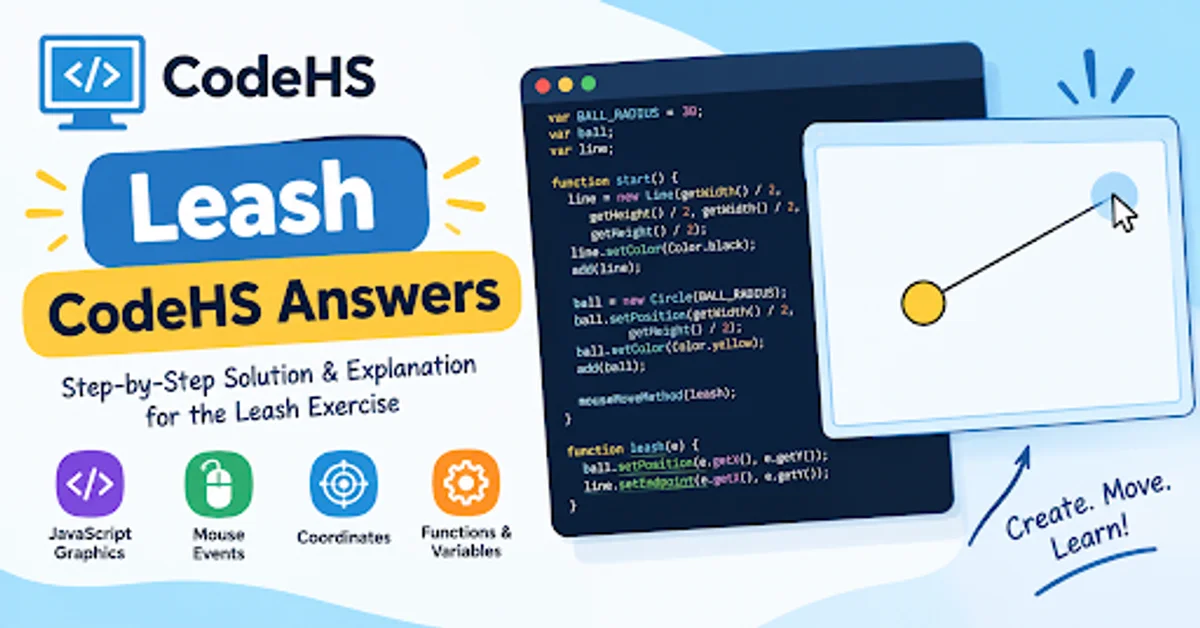
Leash CodeHS Answers refers to solutions and explanations for the Leash programming exercise on CodeHS. This exercise typically uses JavaScript Graphics to create a ball that follows the mouse pointer while a line connects the ball to a fixed point, making it look like the ball is attached to a leash.
When the mouse moves, the ball follows the pointer, and the endpoint of the line moves to the same coordinates. The opposite end remains fixed, creating the appearance of a ball connected to an attachment point.
The primary goal of the Leash assignment is to teach interactive graphics and event-driven programming. Students learn how a program can respond to mouse movement instead of displaying only a static image.
Understanding leash codehs answers also helps students practice object creation, variable scope, coordinate calculations, and callback functions. These skills are useful in other Computer Science exercises involving animations, drawing applications, and simple games.
Related: Classroom15X: Best Games and Complete Guide
Leash CodeHS Answers: Complete Code Solution
JavaScript Graphics Code
The following example demonstrates the typical behavior expected from a Leash-style assignment. It creates a yellow circle and a black line at the center of the canvas, then updates both objects when the mouse moves.
This leash codehs answers example creates the graphics once and reuses them throughout the program. The Circle object represents the moving ball, and the Line object connects the fixed starting point to the moving endpoint.
The example uses the CodeHS JavaScript Graphics environment, which provides functions such as add(), getWidth(), and mouseMoveMethod(). It is important to remember that these are environment-specific features, so the code will not run unchanged in every ordinary JavaScript editor.
How to Run the Code in CodeHS
To test this CodeHS Leash solution, open your course and navigate to the Leash assignment. Read the instructions, then enter the example in the provided Code Editor if it matches your assignment requirements.
Run the program and move your mouse across the graphics canvas. The circle should follow the pointer while the line remains attached to its original starting point. If your assignment specifies different colors, dimensions, or variable names, make the necessary adjustments before submitting your work.
How Does the Leash Code Work?
Creating the Ball and Line
The first step in the leash codehs answers solution is calculating the center of the graphics canvas. The getWidth() function returns the canvas width, and getHeight() returns its height. Dividing these values by two identifies the central X and Y coordinates.
The program then creates a line using four coordinates: the starting X, starting Y, ending X, and ending Y. Initially, both endpoints are identical, so the line has no visible length. The circle is created with new Circle(BALL_RADIUS) and positioned at the same center point.
Finally, add(line) and add(ball) display the objects. Creating an object and displaying it are separate actions, so both graphics must be added to the canvas.
Making the Ball Follow the Mouse
After creating the graphics, the program registers the leash function with mouseMoveMethod(). When the mouse moves, CodeHS calls the function and supplies information about the current pointer position.
The callback moves the ball to the mouse coordinates and changes the line’s endpoint to match. Because both updates use the same X and Y values, the ball stays connected to the line.
This is one of the most important ideas behind leash codehs answers: the program does not create a new circle or line every time the mouse moves. Instead, it updates the existing objects.
Understanding the JavaScript Functions
Using mouseMoveMethod()
The mouseMoveMethod() function registers a callback that responds to mouse movement. In the example, mouseMoveMethod(leash) tells CodeHS to call the leash function when the pointer moves across the canvas.
Notice that the function name is written without parentheses. The program passes the function itself to the event handler rather than calling it immediately. Writing mouseMoveMethod(leash()) would attempt to execute the function at the time of registration.
Understanding this difference makes the leash codehs answers example easier to follow. The same callback concept is used in many interactive programs that respond to clicks, keyboard input, and other events.
Using setPosition() and setEndpoint()
The setPosition(x, y) method changes the position of a graphics object. In this exercise, ball.setPosition(e.getX(), e.getY()) moves the circle’s center to the current mouse coordinates.
The setEndpoint(x, y) method updates the ending point of the line while preserving its starting point. This creates the leash effect because the line’s attachment point stays fixed as its other end follows the ball.
The example also uses getWidth() and getHeight() to calculate the center. Meanwhile, e.getX() and e.getY() retrieve the horizontal and vertical mouse coordinates from the event object. These functions work together to produce the expected visual behavior.
Why Are Variables Important in the Leash Exercise?
Understanding Ball and Line Variables
Variables allow the program to store references to graphics objects. In the leash codehs answers example, ball refers to the circle, while line refers to the line.
After creating these objects, the program can update them whenever necessary. For example, the callback uses ball.setPosition() to move the existing circle instead of creating a replacement.
The BALL_RADIUS variable stores the circle’s radius. Using a descriptive constant makes the code easier to read and allows the ball’s size to be changed without searching through several functions.
Using Global Variables Correctly
The ball and line variables are declared outside the start() and leash() functions. This allows both functions to access the same object references.
If the graphics were stored only in local variables inside start(), the callback might not be able to access them by those names. Understanding variable scope is therefore an important part of learning how the CodeHS Leash solution works.
Global variables should be used thoughtfully, but they are practical for this small exercise. They allow one function to create the graphics while another function updates them in response to mouse events.
Common Leash CodeHS Errors and Fixes
Ball Not Following the Mouse
If the ball does not move, begin by checking whether mouseMoveMethod(leash) appears inside start(). Make sure the callback name matches the function declaration and that the function contains the correct ball.setPosition() statement.
Next, confirm that the circle was created and added to the canvas before the callback attempts to update it. If an error mentions an undefined variable, inspect the declarations and assignments.
These checks solve many common problems encountered when testing leash codehs answers. Correct spelling, capitalization, and parentheses are also important because JavaScript is case-sensitive.
Line Not Connecting to the Ball
If the circle follows the pointer but the line does not, inspect the line-update statement. The callback should use line.setEndpoint(e.getX(), e.getY()) to move the line’s endpoint to the same position as the ball.
Check that the line was created and added to the canvas. Also confirm that its starting coordinates remain unchanged. Moving the entire line instead of updating the endpoint can prevent the expected leash effect.
If the line appears behind the ball, review the order in which the objects are added and compare the result with your assignment instructions. A small adjustment may improve the appearance without changing the underlying logic.
How to Test Your Leash CodeHS Solution
Checking Mouse Movement
Testing is an essential part of completing the leash codehs answers exercise successfully. Start the program and verify that the circle appears at the intended starting point. The line should begin at the same central location.
Move the mouse slowly across the canvas. Observe whether the circle follows the pointer and whether the line remains connected. Test several directions, including moving upward, downward, left, right, and toward the corners.
If the program behaves correctly during these tests, you have confirmed that the main graphics and mouse-event logic is working as intended.
Fixing Graphics and Coordinate Issues
Incorrect coordinates can make the ball or line appear in an unexpected location. Check that the center is calculated using getWidth() / 2 and getHeight() / 2 if the assignment requires a central starting position.
If the line becomes disconnected, confirm that the ball and line endpoint use the same mouse coordinates. If an error occurs, read the message carefully, correct one issue at a time, and rerun the program.
This step-by-step debugging approach is more reliable than changing several statements at once. It also helps you understand the reason behind each correction.
What Programming Skills Does the Leash Exercise Teach?
Event-Driven Programming Basics
Event-Driven Programming allows software to respond to actions such as mouse movement, clicks, or keyboard input. Instead of relying only on a fixed sequence of commands, the program waits for events and executes registered callbacks.
The Leash assignment demonstrates this concept through mouseMoveMethod(). Every time the mouse moves, the registered function updates the circle and line.
Learning this pattern through leash codehs answers provides a useful foundation for building interactive games, visual tools, and responsive applications. It shows how user actions can directly influence what appears on the screen.
Understanding Coordinates and Graphics Objects
The exercise introduces the coordinate system used by the graphics canvas. X represents horizontal position, while Y represents vertical position. Together, these values identify a location on the canvas.
Students also learn how graphics objects can be created and updated. The circle’s position changes through setPosition(), while the line’s endpoint changes through setEndpoint().
The CodeHS JavaScript Graphics Library provides the methods used in this assignment. Similar concepts are also useful in other graphics environments, including programs built with the HTML5 Canvas API, although their syntax may differ.
Tips for Completing CodeHS Assignments
How to Understand Code Instead of Copying
A code example can be helpful, but understanding each statement is more valuable than copying a solution without learning how it works. When studying leash codehs answers, ask yourself why the variables are declared outside the functions and why both graphics use the same mouse coordinates.
Try explaining the program in your own words. You should be able to describe how the objects are created, how the mouse callback is registered, and how the line stays connected to the moving ball.
Follow your teacher’s instructions and your course’s academic integrity rules. If outside solutions are restricted, use this guide to understand the concepts and write your own implementation.
Practicing JavaScript Graphics Skills
Once the basic program works, experiment with small changes. Adjust the ball’s radius, change its color, or move the fixed starting point of the line. Observe how each modification affects the result.
You can also explore other CodeHS programming exercises involving circles, rectangles, keyboard events, and mouse clicks. These activities strengthen your understanding of graphics objects, functions, and event handling.
Regular practice will make future JavaScript assignments easier to approach. Rather than relying entirely on CodeHS coding solutions, use each exercise to develop problem-solving skills that transfer to other projects.
Related: Incestflox: Complete Guide to the Unknown Term
Frequently Asked Questions
Why Does the Leash Code Use Mouse Events?
The leash codehs answers solution uses mouse events to make the graphics interactive. When the mouse moves, the program updates the circle’s position and the line’s endpoint. Without the registered mouse event, the objects would remain at their initial positions.
How Can I Fix Errors in My Leash Program?
Check the callback registration, variable declarations, graphics creation, and coordinate values. Make sure setPosition() updates the ball and setEndpoint() updates the line. Read error messages carefully and test each correction separately.
Can the Leash Exercise Differ Between CodeHS Courses?
Yes. Assignment requirements may vary by course or version. Some versions may specify particular colors, variable names, object sizes, or starting coordinates. Always compare your solution with the instructions shown in your own CodeHS course.
Can I Run Leash CodeHS Answers Outside CodeHS?
The example cannot run unchanged in a standard JavaScript environment because it uses CodeHS-specific graphics functions. To reproduce the behavior elsewhere, you would need to implement equivalent graphics objects and mouse-event handling, potentially using the HTML5 Canvas API.
Summary
The leash codehs answers exercise is a useful introduction to interactive programming. It combines graphics objects, variables, coordinates, and mouse events in a small project that demonstrates how JavaScript can respond to user input.
The most important lesson is to create the graphics once and update the existing objects whenever the mouse moves. Understanding mouseMoveMethod(), setPosition(), setEndpoint(), and variable scope makes the program easier to troubleshoot and adapt.
Use the example as a learning resource, test the code in your CodeHS environment, and follow your assignment’s exact requirements. With practice, the concepts behind this exercise can help you build more advanced graphics projects and become a more confident programmer.
2 thoughts on “Leash CodeHS Answers: Complete Code Solution”